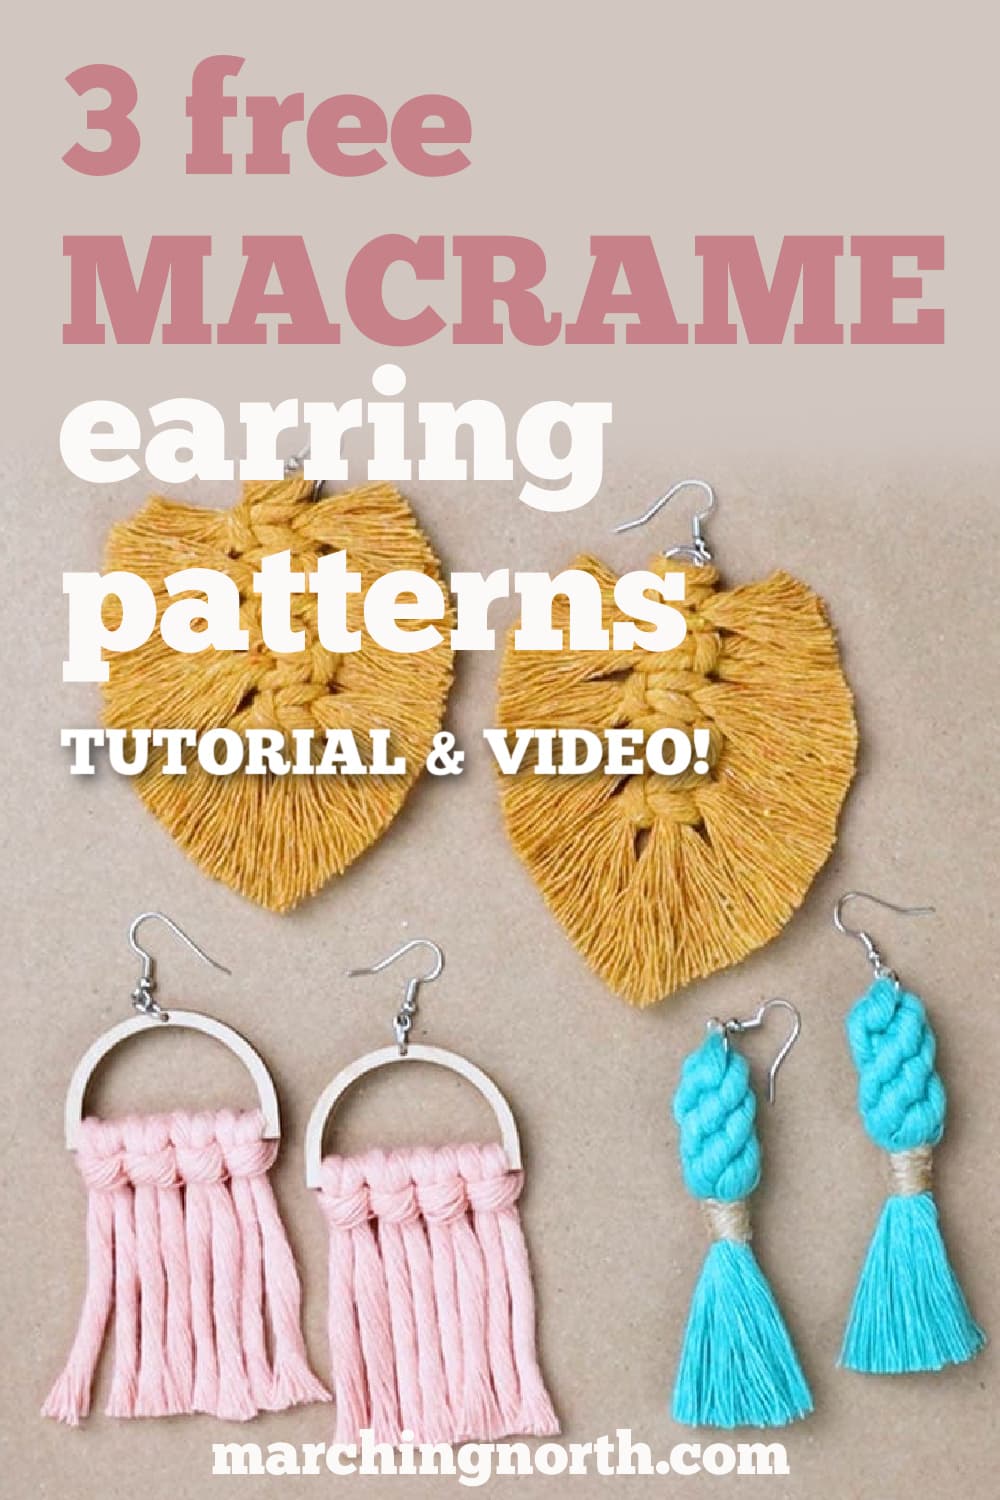
How to Make Macrame Earrings (+3 Free Patterns!)
Learn how to make 3 different types of DIY macrame earrings in this step-by-step tutorial!
Macrame jewelry has been so popular and trendy lately. Now, you can make your own boho pair of earrings in whatever color you like using simple materials that you can find in any craft store!
I’ll show you what supplies and jewelry findings you need, and walk you through the macrame technique of creating these 3 different macrame earring patterns.
Want to remember this? Post these Macrame Earring Patterns to your favorite DIY Pinterest board!
(This post may contain affiliate links. If you click one and make a purchase, I may receive a small commission at no extra cost to you. Read the disclaimer here. Thank you for your support!)
Macrame for Beginners: Quick Start Guide!
Are you new to macrame? Get started off right with my ultimate guide to macrame for beginners!

You’ll learn everything you need to do macrame, including the best macrame supplies, how to set up your macrame workspace, how to estimate macrame cord, where to find free patterns and more.
Plus, I’ll teach you a few of the basic knots, like the lark’s head knot, square knot, and double half hitch knot (or clove hitch knot).
You’ll be making your own wall hangings, plant hangers, jewelry and more in no time! It’s a fun way to relax in the evening, and the good news is all the macrame projects you create make great gifts as well!
Where to Get Cute Macrame Earring Findings
You can find so many cute macrame earring blanks online!
Over on Etsy, I found a treasure trove of different wooden earring findings that are perfect for making macrame earrings and jewelry.
Here are a couple of my favorite places to pick up wooden macrame earring blanks:
You can also use a hoop earring as a base and it would look really pretty!
Best Macrame Cord for Earrings
My favorite type of macrame cord to use for earrings is single strand cotton. For the patterns below, I used 3 and 4 mm macrame string in a variety of colors.
You can use anywhere from 1.5 mm all the way up to 5 mm to make macrame earrings like the ones in this tutorial.
If you’re looking to make a micro macrame pattern, that will require much thinner cord, crochet cotton, or embroidery floss.
I almost always use cotton macrame cord, and it works great for these cute boho earrings!
List of Supplies You’ll Need to Make Macrame Earrings
- Macrame string (I used 3 mm for the yellow feather earrings, and 4 mm for the other two designs) You’ll find the cut list for each tutorial below.
- Earring hooks (2 for each pair of earrings)
- 8 mm jump rings (2 for each pair of earrings)
- 2 wooden half circle earring blanks
- Wire comb or macrame brush
- Sharp scissors
How to Make Macrame Earrings
See the full step by step video tutorial for these macrame earrings on my YouTube channel!
How to Make Macrame Feather Earrings
Cut 3 mm single strand macrame string in the following lengths:
- 2 pieces @ 8″ long (for center cords)
- 20 pieces @ 5″ long (for feather fringe)
The first step is to grab your jewelry pliers and two jump rings. Open the jump rings and hook them onto the earring hooks. Close back up the jump rings.
Take one of the 8″ pieces of cord and attach it to one of the jump rings with a lark’s head knot. Repeat for the other earring.
Pin or tape one of the earrings down to a flat surface. Take one of the pieces of 5″ cord, fold it in half, and place it under the center cords with the loop facing the left.
Take another piece of 5″ cord, fold it in half, and place it over the center cords on top of the one you just placed, but facing the opposite direction.
Then bring the ends of the bottom cord through the top loop, and bring the ends of the top cord through the loops of the bottom cord.
Pull on the ends of both ends of the cord to tighten the knot.
Slide the knot up by the lark’s head knot. Now you’re going to repeat that for the next set of cords, but in reverse.
So the first cord goes under the center cords with the loop facing the right, and then top cord loop will be facing the left.
Continue this alternating pattern until you have five pairs of cords attached. Repeat that process for the other earring.
Grab your favorite macrame brush and brush out the fringe of both earrings.
Then grab your favorite pair of sharp scissors and cut the excess cord off, and shape the fringe into a nice feather or leaf shape.
Done!
How to Make Macrame Half Circle Fringe DIY Earrings
These earrings are a fun easy project and an awesome last minute gift idea!
Cut 4 mm single strand macrame string in the following lengths:
- 8 pieces @ 6″ long
- 2 wooden half circle earring frames
Take one of your 6″ long pieces of cord, fold it in half, and attach it to the bottom of the half circle frame with a lark’s head knot.
Repeat that with three more cords. You’ll end up with four cords attached all together.
Note: if you want to use smaller cord, you may need to add more pieces to cover the earring and that’s totally fine.
Use your jewelry pliers to open a jump ring and thread the end through the hole in the top of the macrame earring blank.
The final step is to thread the earring hook onto the jump ring, and then close it back up.
Done! It doesn’t get much easier than that!
Macrame Crown Knot Tassel Earrings
Cut 4 mm single strand macrame string in the following lengths:
- 4 pieces @ 12″ long
- 2 pieces of jute twine @ 12″ long
Thread two pieces of 12″ cord through a jump ring. Lay the cords on your work station so the bottom one is going horizontal and the top one is vertical. The jump ring will be in the center.
Now we’re going to start tying the crown knot.
Start by taking the bottom cord up to the right, laying it on top of the right cord.
Then take the right cord, and fold it over the top cord with the end facing the left.
Now, take the top cord and fold it down over the left cord.
Last, take the left cord and fold it over to the right and bring the end through the first loop formed at the beginning.
Pull on all the cord ends evenly to tighten up the knot. That makes one crown knot.
You’re going to repeat that process 4 more times, making 5 crown knots all together.
Here’s how the earring will look after you finish the crown knot sennit.
Now you’re going to grab a 12″ piece of twine, and tie it around the cords at the base of the crown knots.
Wrap the end of the jute around several times, I wrapped mine 5 or 6 times, and tie it with a double knot to secure.
Then thread the ends of the jute onto a large eye needle and feed them through the wraps to hide them. Trim off the excess.
Use your jewelry pliers to carefully open the jump ring at the top of the earrings and thread on an earring hook.
Then you just have to trim down the tassel and brush it if you want.
Done!
In Conclusion
I hope you enjoyed these 3 macrame earring patterns!
If you make some of these, please share a pic over on Instagram and tag me @marchingnorth so I can take a look. It really makes my day to see your awesome creations!
Related Posts
Thank you Crystal for all of the great Macrame tutorials you share. So great that you are keeping the craft alive 👍🏼 Macrame is beautiful!
Have a great Holiday Season!