How to Join Granny Squares with the Continuous Join As You Go Method (CJAYGO)
Learn how to join granny squares with a continuous final round in this step by step photo tutorial and video!
Want to remember this? Post this How to Join Granny Squares with CJAYGO tutorial to your favorite DIY Pinterest board!
(This post may contain affiliate links. If you click one and make a purchase, I may receive a small commission at no extra cost to you. Read the disclaimer here. Thank you for your support!)
There are so many different joining methods for crochet granny squares.
You’ve got the whip stitch seaming method, the invisible join, you can attach them with slip stitches, you can use the mattress stitch, you can do a flat braid join, there’s the basic single crochet join method, there’s the invisible seam method, don’t forget the flat slip stitch join method, the list of different ways to join goes on and on.
If you’re like me, you probably aren’t a huge fan of weaving in 8 million yarn ends once you’re finished attaching all your squares.
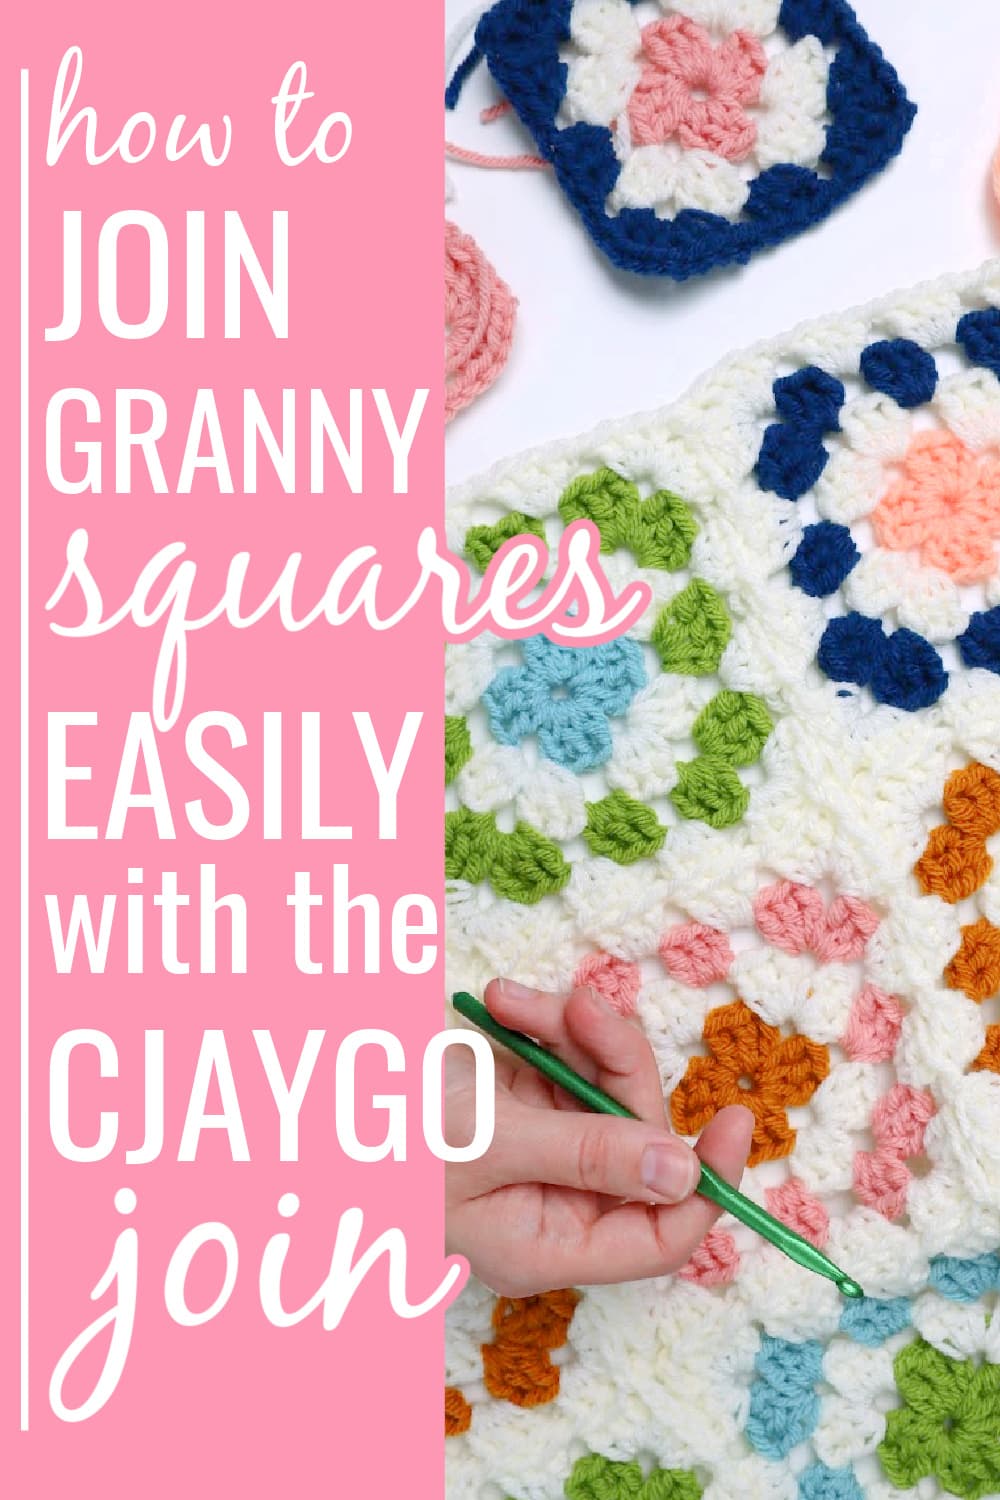
That’s why I love the continuous JAYGO method!
To attach your crochet squares with this technique, you just work your grannies until you have all but the last row complete.
You can make as many as you want, as long as each row has the same amount.
Once you’re finished, you’ll only have 2 yarn ends to weave in with your yarn needle, isn’t that amazing?!
Granny Square Patterns

Before you can join your squares, you’ve got to make them!
Here are some different types of granny afghan squares to try:
- basic granny square
- sunburst granny square
- no holes granny square version 1
- no holes granny square version 2
- daisy granny square
- mitered granny square
- spiral granny square
How to Join Granny Squares with CJAYGO Method
Learn how to join granny squares with my personal favorite method, the CJAYGO join!
Supplies You’ll Need
- yarn in your choice of joining color (I recommend using the same type and weight as your granny squares)
- crochet hook that fits your yarn (I’m using 5.0 mm)
- tapestry needle
- scissors
Notes
- Pattern is in US Terms
- Make sure your granny squares have the right sides facing up. I like to stack them in the order I’ll need them so I don’t end up with any wrong sides facing up.
- You’ll be joining all the squares with one color of yarn.
Abbreviations
- sl st – slip stitch
- ch – chain
- ch sp – chain space
- dc – double crochet
Special Stitches
- granny cluster – 3 double crochet worked in one chain space
- corner – 3 double crochet, chain 2, 3 double crochet all in the same corner space
- flat join – drop the loop from your hook and keep a hold of it so it doesn’t come undone. Insert hook into the closest chain space from the first granny square. Place the loop back on your crochet hook and tighten up the yarn. Yarn over and pull through the loop and the chain space.
Video Tutorial
Check out the video tutorial for this granny square joining method, and don’t forget to subscribe to Yarn Stash with Marching North!
Instructions
Here’s a map showing the path we’ll be taking to join our granny squares.
Row 1
We’re going to start in the top right corner of the top right square.
Join your yarn onto the far right side of that corner space with a basic double knot.
Insert your hook into the ch sp. Pull up a loop. Yarn over and pull through to make the first chain.
Now chain 2 more times (this makes our chain 3 and counts as the first dc of this corner).
Work 2 dc, ch 2, 3 dc, ch 1 into corner space.
Work a granny cluster + ch 1 into next two spaces.
In next space, work a corner (3 dc, ch 2, 3 dc, ch 1).
Work a granny cluster + ch 1 into next two spaces.
Work a corner.
Work a granny cluster + ch 1 into next two spaces.
In the next corner, work 3 dc.
Now we’re going to join the next square.
Ch 2, make 3 dc in corner space of next square.
Turn your work around so the first granny square is above the one you just joined.
Now we’re going to work across the top of the second granny square and join it to the first.
Make a flat join in the chain space of top granny square.
Make granny cluster then a flat join in next two ch sp.
When you reach the corner space, make a corner as usual. DON’T attach it to the corner of the other granny square.
Continue working granny clusters and corner along next two sides of the granny square.
When you reach the bottom corner, attach the next granny square in the same manner as the previous one.
Repeat that process for all the remaining granny squares of this row.
When you get to your last granny square, work to the bottom left corner, make 3 dc in that corner and then we’ll move onto Row 2.
Row 2
Ch 2, attach the next granny square by making 3 dc in one of the corners. On the map, this is the granny square marked #5.
Make a flat join, then continue making granny clusters and flat joins until you reach the corner.
At the corner, work 3 dc into corner space. Ch 1, then make a flat join to the corner diagonal to this corner. It’s the upper left corner from where you are now.
Grab your next granny square for this row, and make 3 dc in the corner to attach it.
Continue this pattern across the row until you have all the granny squares attached.
When you reach the last square, work to the corner, then make 3 dc in the corner space.
Now we’re going to attach these two corners together since it’s on the outer edge.
Ch 1, and make a flat join to the corner of the other square.
Continue as usual across the top of the granny square, down the left side, and across the bottom until you reach the corner.
Make 3 dc in the last corner, ch 1, make a flat join across to the corner diagonal to this corner (it’s the only one still unattached).
Continue across the top of the next granny square down, making 3 dc in the corner, and attaching with flat joins in between each granny cluster.
Work the left corner as usual and DON’T attach them.
Repeat this process for all the granny squares in this row.
When you get to the last granny square of the row, work to the bottom left corner, make 3 dc in that corner and we’ll move onto the next row.
Row 3 and On
The rest of the rows will be done the same way as Row 2.
When you reach the last row, we’ll finish the two unfinished edges. After you make 3 dc in the bottom left corner of the last square, move onto the next step.
Finishing the 2 Outer Edges
Finish the corner and work across the bottom edge of the square you’re on.
When you reach the joining point of the two rows, make a flat join into the loop between the two squares.
Continue across the squares working normal granny and corner clusters, and joining with a flat join to each loop in between the squares.
When you get back to where you started, ch 1 and sl st into the top of the ch 3. Finish off.
Done!
Now all you have to do is weave in those two little ends and your crochet work is finished!
In my opinion, this is the easiest way to attach granny squares for a blanket.
What do you think? Let me know down below!
More Free Crochet Patterns
I want to make a granny square long jacket. I have granny squares already made for my project. I want to join the squares using the join as you go method. But I think I need a pattern for my complete project from making the squares to putting them together. I have to have the instructions in front of me not on YouTube. Any help you can give me would be greatly appreciated
Do you not block your granny squares then? Thanks!!
If you want to block them you could do that before the joining row- that’s what I would do!