How to Make DIY Punch Needle Threaders | Video + Tutorial
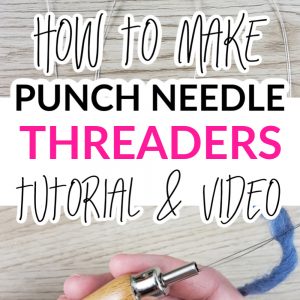
Did you know you can make your own punch needle threader?
It’s so easy! All it takes is some wire, a pair of pliers, and something to attach to the end.

In this tutorial, I’ll show you how to make DIY punch needle threaders with a written tutorial and a video. (Yes, video!)
You’ll never have to interrupt your punch needle project with a trip to the craft store again!

To do this project, you’ll need 28 to 36 gauge wire. The higher the number, the thinner the wire.
If you’re making threaders for a rug punch needle you can use anywhere between 28 and 36 gauge wire (I prefer 28 gauge for bulky wool yarn), but if you’re making one for an embroidery punch needle, you’ll want to stick with 34 or 36 gauge wire.
Types of Wire
In the video, you’ll hear me mention that I’m using “half-hard” wire.
What does that mean?
I honestly wasn’t sure when I was recording, but I’ve since done some research and here’s what I found about the different types of wire according to Wikipedia…
“Dead soft wire is extremely soft and pliable. It can be easily bent and is excellent for making rounded shapes such as spirals. It is also excellent for wrapping wire around beads to make them look as though they are encased. The disadvantage of using soft wire is that the finished piece can be bent out of shape if not properly handled.
Half-hard wire is slightly stiffer than dead soft wire. Half-hard wire is excellent for making tight, angular bends, for making loops in wire, and for wrapping wire around itself. However, it is not very useful for making spirals. Finished pieces made with half-hard wire are usually more permanent than pieces made with soft wire.
Hard wire is very stiff and tends to spring back after being bent, making it harder to work with when using a jig; it cannot be used to make a spiral. Pieces made with hard wire have the advantage that they are not easily accidentally deformed.”
So now we know the difference. Thanks, Wikipedia!
Another fun fact: you can use the high “e” string from an acoustic guitar to make punch needle threaders!
In the photos down below, that’s what I was using (because my husband so graciously donated his guitar’s old crusty “e” string in the name of punch needle science!)

I mentioned that you can use an “e” string in the video but I hadn’t actually tried it yet. I can now verify that they DO work!
The tutorial and video for these DIY Punch Needle Threaders are down below.
While you’re at it, I made another video and tutorial you may be interested in showing how to make your own DIY gripper frame. Be sure to check that out! (I love my new DIY gripper frame!)
(This post may contain affiliate links. If you click one and make a purchase, I may receive a small commission at no extra cost to you. Read the disclaimer here. Thank you for your support!)
Supplies You’ll Need to Make DIY Punch Needle Threaders
- Tarnish-resistant wire in one of the following gauges (remember, higher number = thinner wire)
- Button, bead, ring, washer, etc to attach to the end (or masking tape)
- Jewelry making needle nose pliers
- Wire cutters
- Ruler
DIY Punch Needle Threaders Tutorial
Cut the Wire
First, you need to decide how long of a threader you want to make.
If you have a threader laying around (that you haven’t lost), measure the length. Then double it and add two inches to that number.
That’s the length of wire you’ll need to cut to make your own threader.
If you don’t have a threader to use as a guide, measure the length of your punch needle. Add three inches to the total length, and then double that number.
Once you figure out how long your wire needs to be, measure and cut it with your wire cutters.

Bend the Wire
Bend the wire in half right in the middle. The easiest way to do that is to line up the ends, and then run the wire through your fingers until you reach the bend.

Pinch it until it’s bent pretty well, and then take your needle-nosed pliers and pinch the loop so it’s really tight.

Now it’s time to handle the ends.
Secure the Ends
For this example, I’m using an old guitar string and it has this little loop/tube thing at the end that I kind of like, so I’m using that as the handle.


You can also wrap your wire ends around a button, bead, washer, or charm.
If you don’t want to mess with wrapping the wire, just secure the ends with a piece of masking tape.
Voila!

Wasn’t that so easy? I may never buy another punch needle threader again now that I’ve tried this easy DIY.
If you make one of these threaders, let us know down below in the comments! I’d love to know how yours turned out.
Related Posts
- Punch Needle Tips You Need to Know BEFORE You Try It
- Heart Punch Needle Trivet | Free Pattern & Tutorial
- How to Make a DIY Gripper Frame for Punch Needle | Video & Tutorial


Hi Crystal!
Can you use the high E guitar string threader on the smallest needle of the Ultra Punch Needle?
Really appreciate all you advice!!
Thank You,
Karen
The Ultra Punch is pretty small and I’ve found the only threader that works well for it is the really fine ones like the ones that come with it. You can find them online, I purchase new ones from a shop on Etsy- just search for “Ultra Punch Needle Threaders” and you should be able to find them. Thanks for stopping by!