How to Make a DIY Gripper Frame for Punch Needle | Video + Tutorial
Have you been wanting to upgrade to a Gripper Frame for your punch needle projects?
Learn how to make your own for half the cost in this DIY Gripper Frame tutorial!

I’ve been wanting to get a gripper frame for a while, but I just kept putting it off.
There are some great ones available online, but when I know there’s a way to make it myself and save money, I just have to try it.
(This post may contain affiliate links. If you click one and make a purchase, I may receive a small commission at no extra cost to you. Read the disclaimer here. Thank you for your support!)
What’s So Great About a Gripper Frame, Anyway?
Gripper frames are awesome because they hold your foundation fabric SUPER tight (with no slipping).
You can use them for Monk’s cloth, Weaver’s cloth, rug linen, and linen.
You can customize the size and have a nice large area for punching, and if your project is larger than the work area, you can carefully move it on the frame.
If you want to see some popular gripper frames for sale (that I totally recommend if you don’t want to make your own), here’s a great one, and here’s another.
Below you’ll find a written and video tutorial that will show you exactly how to make your own gripper frame.
It’s not difficult, but there are a few places where things can go terribly wrong (believe me, I found out the hard way!) so you’ll definitely want to read and watch the video before you take the plunge.
The frame for this project is the easiest part of the whole thing.
You can buy sets of canvas stretcher bars, and they have slots on the ends that just slide right together. No nails or screws required!
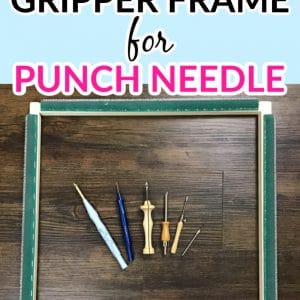
Supplies You’ll Need to Make a DIY Gripper Frame for Punch Needle
- 2 sets of Canvas Stretcher Bars (I used 18” for mine, I wouldn’t recommend going much larger than that, it’ll be hard to handle)
- Gripper Strips (if you’re getting Canvas Stretcher Bars larger than 12”, you’ll need two)
- Staple Gun
- “T” Staples (like the ones in this set)
- Awl
- Heavy-duty scissors or craft knife
- Work gloves
DIY Gripper Frame Tutorial
Assemble the Frame
This part is super easy, the ends have slots that slide together.
Once it’s put together, I recommend stapling the seams together on the back so they don’t slide apart while you’re attaching the gripper strips.
Cut the Gripper Strips
Next, measure the inside width of one of the sides. That’s roughly how long you need to cut the gripper strips. (It doesn’t have to be exact.)
This part is important. Mark where you are going to cut the gripper strips. Then, remove a row of the metal staples from the back of the gripper strip where you’re going to cut.
They pop right out. (This is what the awl is for in the supply list but you can use any pointy tool you want.
I say this is important because I didn’t do this at first. I just tried to cut through with my scissors. It somewhat worked, but it was really hard to cut and also my scissors took a major beating. Learn from my mistake!
While we’re talking about learning from mistakes, I have another one for you!
The little spikes on the gripper strips bend in one direction. It’s important to have them pointing away from the inside of the frame.
I (of course) stapled two of the gripper strips on facing the wrong way at first, and my fabric didn’t stick when I tried to stretch it.
After doing some quick research, I figured out my mistake. Luckily it wasn’t too hard to remove the strips and put them back on the right way.
So yeah, don’t do that!
Attach the Gripper Strips
Once you get all your strips cut, line one up with the inside edge of the frame (facing the right direction), leaving about an ⅛ to ¼ inch of space from the edge, and staple it securely in place with the “T” staples.
I recommend putting a staple every ½” or so.
Repeat that process on each side.
Now, make sure you have on your gloves (once again, I learned this the hard way!) Hold the frame upright and wrap the gripper strip over onto the top of the frame.
Press down the gripper strip and staple every ½” along the edge.
You’ll need to hold the leading edge of the gripper strip down while you do this, if you don’t the staples tend to pop out.
Repeat this process on each side.
Voila!
You did it! That wasn’t so bad, was it? Ok, I had a few issues, but all in all, I’m over the moon for my new DIY Gripper Frame!
Let us know in the comments down below if you made one of these and how the process went for you.
I hope you enjoyed this tutorial! What size gripper frame is your favorite?
The 18” one I made is a little on the larger size, but it’s perfect for some projects I’m working on (that you’ll be hearing more about in the near future!)
Related Posts
- How to Make a DIY Punch Needle Threader | Tutorial & Video
- How to Make a Punch Needle Sweatshirt | Tutorial + Printable Patterns!
- Must Have Punch Needle Supplies (& Where to Find Them)
Thanks! I was trying to make a very small frame using an old picture frame for small pieces of scrap weavers cloth and could not cut through the gripper strips. I never thought about removing a row. Thanks for your info! Very helpful. Maria