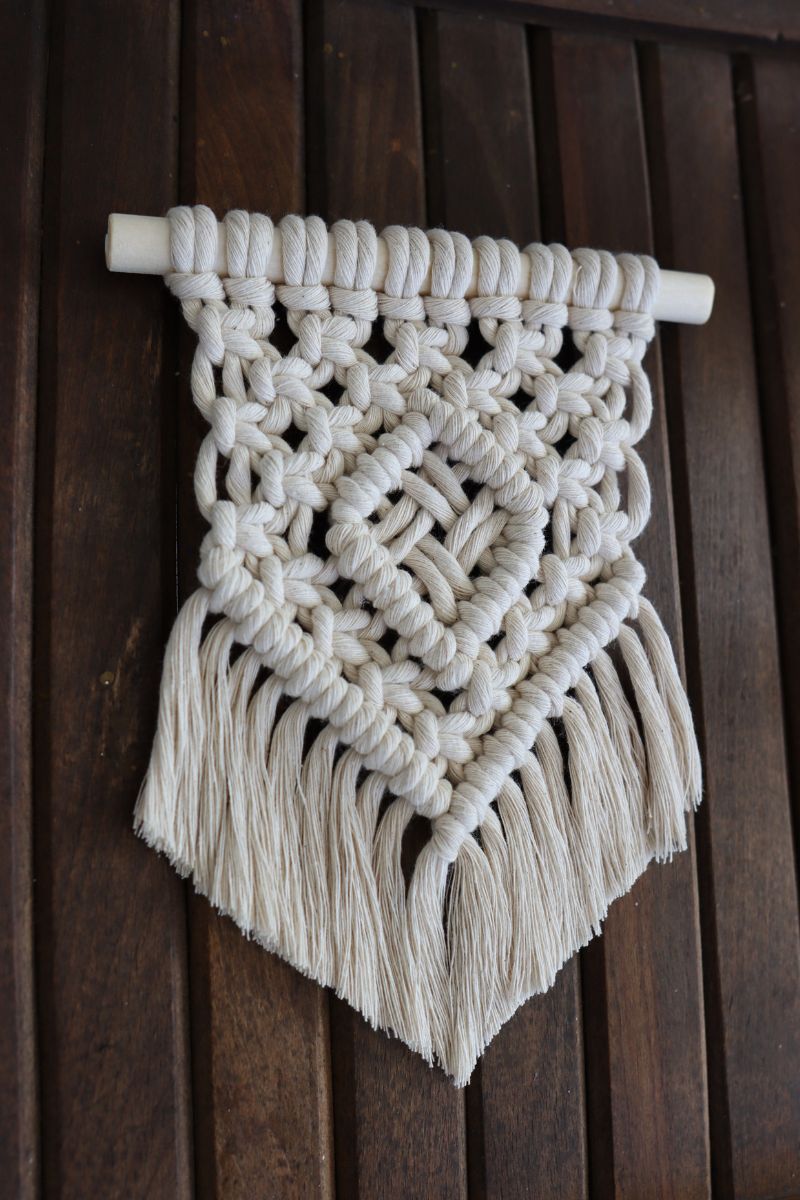
“Auda” Mini Macrame Wall Hanging – Free Pattern and Video!
Learn how to make the Auda mini macrame wall hanging with this free pattern and step by step tutorial!
Don’t forget to pin this for later!
(This post may contain affiliate links. If you click one and make a purchase, I may receive a small commission at no extra cost to you. Read the disclaimer here. Thank you for your support!)
This miniature macrame wall hanging is beautiful and it’s made with beginners in mind.
(I mean, macrame lovers of all levels can make it, but I’m gonna walk you through each step in the pattern and video below, so even if you’re new, you got this!)

Buy the PRINTABLE copy
Auda Mini Macrame Wall Hanging – Printable PDF Pattern!
Reference this pattern any time you want with the printable PDF version!
It’s ad-free, and includes the written pattern with step by step photo tutorial!
Below, you’ll find the free step by step pattern and the video tutorial for this lovely little project.
If you’re totally new to macrame and want to learn the basic knots, let’s do that first!
Also, be sure to sign up below for my free printable PDF knot guide so you can keep it handy while you’re working on your projects!
More Small Macrame Wall Hanging Patterns
Check out all the other free small macrame wall hanging patterns available on my website:
- DIY Mini Checkered Macrame Wall Hanging
- DIY Boho Macrame Wall Hanging with Tassels
- How to Make a Macrame Feather Wall Hanging
- Easy & Colorful Macrame Wall Hanging
- DIY Macrame Sunflower Wall Hanging
- Free Macrame Owl Pattern
- Adorable Small Macrame Wall Hanging (DIY)
Auda Mini Macrame Wall Hanging Tutorial
Supplies You’ll Need
- 6″ long wooden dowel, 1/2″ in diameter
- 5 mm single strand cotton macrame string
- sharp scissors
- comb
Cut List
- 10 pieces @ 48″ long (121.92 cm)
Video Tutorial
Check out the tutorial video for this macrame ornament on my YouTube channel, and don’t forget to subscribe!
STEP 1: Setup
Fold each piece of cord in half evenly and attach them to the dowel using lark’s head knots.
STEP 2: Top square knot section
Using the first 4 cords on the left, tie a square knot.
Continue tying 4 more square knots going across to the right.
Under the first row of knots, skip the first 2 cords on the left and tie a square knot with the next 4 cords.
Tie 3 more square knots going across to the right, and you’ll skip the last 2 cords on the right side as well.
Tie 2 square knots on the left side, starting all the way over on the left. Then tie 2 square knots on the right side in the same way.
You’ll be skipping the 4 cords in the center.
Skip the first 2 cords and tie one square knot on the left side.
Move over to the right side, skip the last 2 cords on the right and tie a square knot using the next 4 cords over.
Tie one square knot on the far left side and one on the far right side.
STEP 3: Making the diamond
Take the two center cords and cross the left one over the right one.
Now we’re going to tie a row of 5 double half hitch knots going down and to the right to make the right top part of the diamond.
Grab the cord that you used to tie the first double half hitch knot of that row.
You’re going to use that cord as the filler cord to tie a row of 4 double half hitch knots going down and to the left.
This will form the other half of the top part of the diamond.
Now we’re going to make the cool woven middle of this diamond.
Take the 2 left center cords and the 2 right center cords and cross the left ones over the right ones.
Then you’re going to grab the next two cords on the right and bring them over the left cords you just crossed over.
The next two cords on the left will already be under the crossed over right cords, which is what you want.
Last, take the second sets of cords from both sides and cross them in the center, left over right. It should look like the picture below.
(I know that sounds complicated, it’s actually not, it’s just sort of hard to explain with words. 🙂
That’s the order you want the cords to stay in while you tie the bottom half of the diamond.
Bend the filler cord from the previous row of double half hitch knots on the left side so it’s facing down and to the right.
Then tie 4 double half hitch knots going down and to the right, and make sure to keep the cords in that same order so the woven part looks right.
Now we’re going to do the same thing on the right side, but you know, going down and to the left.
Now tie one last double half hitch knot in the center, crossing the left cord over the right and this last knot will be going down and to the right.
STEP 4: Tying a few more square knots
Skip the first 2 cords on the left, and tie a square knot using the next 4 cords that’s right next to the diamond.
Under that square knot, skip the first 4 cord and tie another square knot, and then repeat that one more time so you have 4 square knots following along the bottom left of the diamond.
Do that same thing on the other side, but in the other direction.
Tie one last square knot in the center.
STEP 5: Last rows of double half hitch knots
Use the far left cord as the filler cord and, following the line of square knots, tie 9 double half hitch knots going down and to the right.
Do the same thing on the right side, using the far right cord as the filler cord.
Tie one last double half hitch knot in the center, crossing the right cord over the left and tying it going down and to the left.
STEP 6: Trimming the fringe
Now it’s time for the fun part!
Cut the bottom fringe however you like. I cut it following the shape of the wall hanging, but you can also cut it straight across if you prefer.
Comb it out if you want, and then trim it obsessively until it looks perfect.
(Or maybe that’s just me. 🙂
Done!
In Conclusion
I hope you enjoyed this mini macrame wall hanging pattern and will make one (or 10) of your own!
Looking for more fun macrame patterns to try?