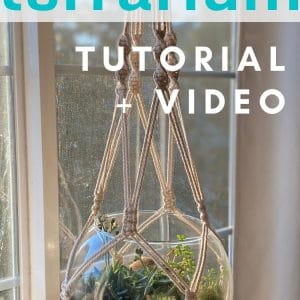
DIY Macrame Hanging Terrarium // Tutorial & Video
If you’re looking for some boho macrame plant hanger tutorials, check out this DIY Macrame Hanging Terrarium!

This macrame plant hanger tutorial only requires three knots (and two of them are almost the same thing).
I’ll walk you through the whole process with a written tutorial and a video. Keep reading to find out more!
When I first planned to make this macrame terrarium, I intended to use fake succulents because I’m really bad at plants.
Once I got it finished I changed my mind and decided to put in a couple of real succulents I’ve managed to keep alive. It looks so pretty hanging in the window, they get enough sun, and they’re right in my face every day so I won’t be as likely to forget they exist and never water them!
I’ll include the supplies I used to put the terrarium together in the supply list in case you’re interested in making your own.
(This post may contain affiliate links. If you click one and make a purchase, I may receive a small commission at no extra cost to you. Read the disclaimer here. Thank you for your support!)
Supplies You’ll Need to Make a Macrame Terrarium Hanger
- 4 mm twisted cotton macrame rope (1 piece @ 20 feet long, and 7 pieces @ 15 feet long)
- 10″ glass terrarium bowl
- Assorted succulents
- Moss
- Small Rocks
- Succulent-friendly potting soil
DIY Macrame Hanging Terrarium Tutorial
Step 1: Make the Hanging Loop
Line up the center of all of the ropes (including the long one). I marked it with a pen to make it easier.

Starting from the center, wrap the long cord around the shorter cords 15 times, moving to the right. Hold the ropes in place in the center with your left hand while you wrap.

Once you’ve done all 15 wraps, tie a temporary knot to hold the right end of the cord in place.
Go back to the center and wrap the long cord around the short cords 15 times going in the other direction. You want to end up with 30 wraps all together.
Related: How to Make a Macrame Plant Hanger (DIY Tutorial & Ideas!)

Tie another temporary knot on the left side.

Now, hang the loop up and tie a wrapping knot to connect it. Be sure to untie the temporary knots BEFORE you tie the wrapping knot.

Step 2: Make the Arms of the Terrarium Holder
Separate out four cords and tie 13 spiral knots (half square knots). Then tie one regular square knot.

Repeat that process with the other three arms.

Move down about 2.5 inches from the spiral knots and make three square knots. I used an old library card as a spacer to help keep all the arms the same.

Repeat that process on the other three arms.

Move down 2.5 inches from the three square knots (I used the spacer again) and tie 13 more spiral knots, ending with a square knot. Repeat that process for the other three arms.
Step 3: Connect the Arms
Measure about 6.5 inches down from the spiral knots and connect the arms by tying three square knots using two ropes from one arm and two from the one beside it. Repeat that process three more times so that all the arms are connected.
Measure down 4 inches and attach the cords together again with three square knots. The picture below is how it will look with one square knot complete.

Repeat that process three more times.
Step 4: Finish with a Wrapping Knot
Measure down about 5 inches from the last row of square knots and tie a wrapping knot to finish off the hanger.

Carefully insert the glass bowl and make sure everything is where it needs to be.

Assemble your terrarium and you’re good to go!

For some tips on succulent terrarium assembly, check out this article.
In Summary
I hope you enjoyed this DIY Macrame Terrarium Hanger project as much as I did! It’ll look awesome in your home, I just love the boho vibe!
If you didn’t already, be sure to subscribe to my YouTube channel for more macrame tutorial videos. I’ve got a lot in the works!
Related Posts
- DIY Macrame Market Bag // Tutorial + Video
- Crazy Easy Macrame Plant Hanger // Tutorial + Video
- How to Make Macrame Feathers (3 Ways!) // Tutorial + Video


Hi Crystal! Final lengthen of this terrarium project, roughly?
Thanks
Hi Crystal, can you give any advice on the alterations that would be necessary if the bowl was bigger? Eg. 12inches?
If the bowl is just a few inches larger, you could space the knots in the bowl section out a bit and it should still work fine. Hope that helps!